
Did you just raise your eyebrows and snicker, in a mistaken conviction that anyone can boil an egg? Well, there’s more to it than meets the eye. If you want to really master the art (science?) of boiling an egg, brace yourself for a steep (but not unsurmountable) learning curve.
How to cook a hard-boiled egg
 Step 1:
For starters, it’s not enough to just dunk eggs into water and turn the heat on. To avoid unpleasant (and smelly) surprises afterwards, you first have to divine what’s inside the shell. Place the eggs earmarked for boiling in a bowl filled with tap water, to which you added some salt. The eggs that sink to the bottom are good to use; those that float are not, so throw them away.
Step 2:
Gently place eggs in an empty pot. To avoid breakage, do not have more than four layers of eggs. A folded cheese cloth arranged on a bottom of the pot also reduces the incidence of shell-cracking.
Step 3:
Fill the pot with cold tap water about 2-3 centimetres above the egg-level. Add a pinch of salt to make the eggs easier to peel when cooked. Never put cold, refrigerated eggs into hot water, because the shells will crack. If you have to go the hot-water route due to time constraints, at least take the eggs out of the fridge and let them sit in bowl filled with tepid tap water for a minute or two.
Step 4:
Place the pot on a stove and turn it on. Put on a lid and bring the water to boil.
Step 5:
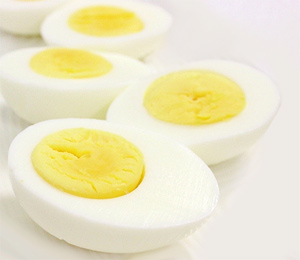
As soon as first bubbles appear, reduce heat or turn it off completely and leave the eggs to sit on the stove in hot water, with the lid on, for 10 to 15 minutes. The timing is of utmost importance: too short, and your hard build eggs will be runny; too long, and they will develop unsightly dark colouring around the yolk.
Tip: If, in spite of all your precautions, a shell cracks during the boiling phase, add salt and/or vinegar to the water. This may help the egg white coagulate faster, plugging the cracks in the shell.
Step 6:
To check whether your eggs are hard boiled without breaking any shells, take one and whirl it on a table. If it turns fast, it is hard boiled. If it turns slowly, it is soft boiled.
Step 7:
Once you are satisfied that your eggs are really hard boiled, stop the cooking process by placing them under cold running water for a short period of time. Chilling the eggs separates the shell, making it easier to remove later on. However, chill the eggs for too long – and the effect is lessened. Dry the eggs and set aside or store in a refrigerator. Consume within five days.
Step 8:
This is the moment many cringe from: peeling a hard-boiled egg. If you followed the steps laid out above to the letter, you should end up with a peeled egg that’s as smooth as freshly Botoxed face. All you need to do now is take a cooled-down egg, roll it on a flat surface to crack the shell slightly and start peeling from the thick end, grabbing the membrane that sits directly under the shell. If there is any resistance, peel the egg under cold running water.
Tip: Experienced cooks say that really fresh eggs are more difficult to peel, so try hard-boiling eggs that you have had for a few days.
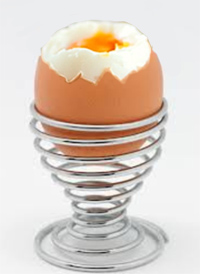
How to cook a soft-boiled egg
 Lighten up; you’ve almost conquered the learning curve!
Cooking a soft-boiled egg is exactly the same as cooking a hard-boiled egg. The only difference is in the cooking time. So, instead of 10 to 15 minutes from when the water starts boiling, cook it for about 5 to 6 minutes. The exact timing will depend on your preferences: some people like their soft-boiled eggs really runny; others like them with solidified albumen, and only the yolk runny.
Once you have ascertained your perfect timing, apply this little trick to get the same result every time, with eggs of a different size: before placing the egg into the water for soft-boiling, pierce the shell at the narrower tip with a needle.
Now, if that does not start your day on a positive note… I don’t know what will.