
With Valentine’s day right around the corner, everyone is looking for a special gift that shows the extra effort and thought put into choosing it. Somewhere in the world two friends will receive identical gifts from their unknowing partners because of recycled gift ideas. To avoid the embarrassments, why don’t you make a personal and unique gift for your loved one? It will also make it more special and endearing.
If you have no clue where to start, don’t worry, we have compiled a few amazing DIY gift ideas for you.
Take a look:
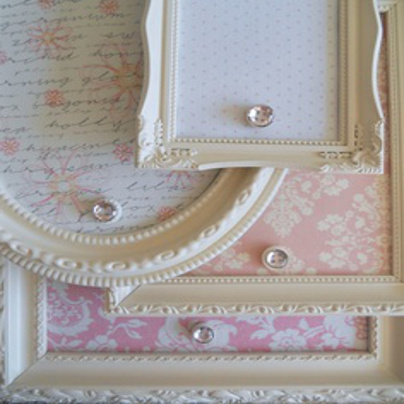
Magnetic memory board
This a great way to show your partner how much you treasure your times together and that you are definitely looking forward to future memories.
Instructions:
1. Find a picture frame for your board.
2. Remove the glass from the frame.
3. Buy a piece of metal sheet that will fit into the frame.
4. Cover the metal with a decorative sheet of paper.
5. Add decorative touches to the frame. You can use stickers, spray-paint stencils or glued images.
6. Place the metal sheet inside the frame and start putting your memories on your board. Remember to leave room for more memories to come and to make the board special, with a love letter, or a handwritten poem.
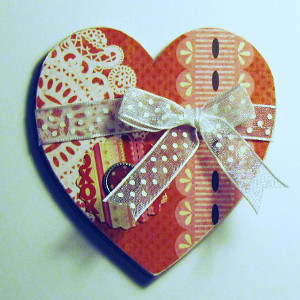
Scrapbook
Take your better half down memory lane by documenting your times together in a hand-made scrapbook.
Instructions:
1. Look for heart-shaped box. Choose a box that your pictures easily fit into.
2. Use the box as a template to cut out your scrapbook pages.
3. Cut out the heart shapes from the paper. Cut out one piece for each page in your scrapbook and make sure that they can be easily bound.
4. Trace the shape of the box onto two sheets of decorative heavy card stock. Cut out the card stock hearts to use as covers.
5. Sandwich the paper hearts between the two card stock hearts. Punch two holes 2 to 4 centimetres apart on one side of the heart.
6. Cut about 30 centimetres length of a fabric ribbon. Pass the ribbon through the two punched holes and tie in a large bow to bind the book together.
7. Attach your photographs to the pages using photo corners or scrapbooking glue. Decorate the pages and cover with stickers and other scrapbooking embellishments.
P.S. Under each image, write as much as you can remember about that day.
8. Place the scrapbook into the box and place the lid on the box. Tie a wide ribbon around the box.
Framed heart lock and key
Create a decoration gift using relationship souveigners.

Instructions:
1. Gather your pieces and make any paper punched shapes you want so you have all of your materials ready.
2. Lay out your design on the paper.
3. Paint your objects with a spray paint. Silver or black will give your objects a nice finish.
5. Once dry, replace all your objects on the paper in your design.
6. Pick up one object at a time and dab glue on the back.
7. Once the glue is dry, frame your piece.
8. Write a love note in the corner or on back of the piece and expect a great response for your beautiful work.
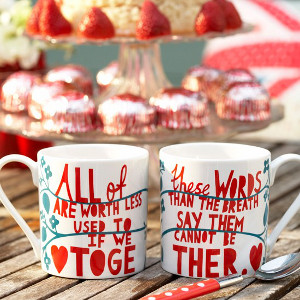
His and hers coffee mugs
Write sweet messages and sign your name on your his and hers mugs.
Instructions:
1. Write a lovely message on the mugs using Pebeo markers.
2. Place your mugs in a cold oven. The mugs need to heat up with the oven.
3. Set your oven at 350 degrees celsius, and then set a timer for 30 minutes.
4. When the time is up, turn off your oven but leave your mugs in the oven to cool. Do not remove them until the oven is completely cooled down.
5. Handwash the mugs before using them.
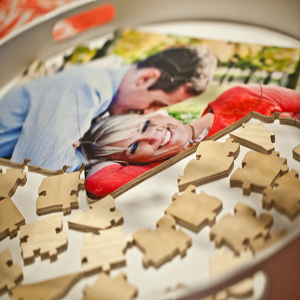
Photo jigsaw puzzle
What could be more fun and cute than a jigsaw puzzle made out of your enlarged photo.
Instructions:
1. Cut a card and your choosen photograph to the same size. Use a craft knife for a nice clean cut.
2. Use a thin layer of glue to stick your photograph to the piece of card. Leave it to dry completely. Make sure the type of glue you choose will not make the paper wrinkle up.
3. Use the pencil and ruler to divide the back of the card into squares: draw lightly so that you can rub out the lines later. Add some almost-circles to each side of each square, to make them into jigsaw pieces.
4. Using the craft knife, ruler and cutting board, carefully cut out each of the pieces.
5. When all pieces are cut, smooth over any very rough edges with a piece of sandpaper.
6. Present the pieces in a nice gift box, with the same picture stuck on the lid of the box.