
The ancient art of mosaics has a long history that began in the 3rd millennium BC. The history of this art form can be found in a variety of different religions and cultures throughout the world. The presence of mosaics in early times was found among the Greeks and Romans and also features among the people of Christian and Jewish religions. This post will give you instructions on how to create your own mosaic art in five easy steps.
 Step 1: Gather the raw materials
First select the tesserae you want to use. Tesserae is the material used in mosaic art. Depending on what you want to create, you could use glass, tiles, terracotta pieces of a pot plant, seashells, stones or even porcelain. You can even include pieces of art, items or objects within the mosaics. You will also need to select the foundation or material on which you will place your mosaics to make your art piece. Your foundation could be a piece of wood, a pot, a table, stones, garden features or even a photo frame.
Step 2: Create a pattern or template
Before starting the mosaic process it is important to get everything ready. You don’t want your cement getting hard while you are still thinking of ideas and trying to be creative. Now is the time to decide on your mosaic layout and plan out your colours and patterns.
Step 3: Put together a mockup
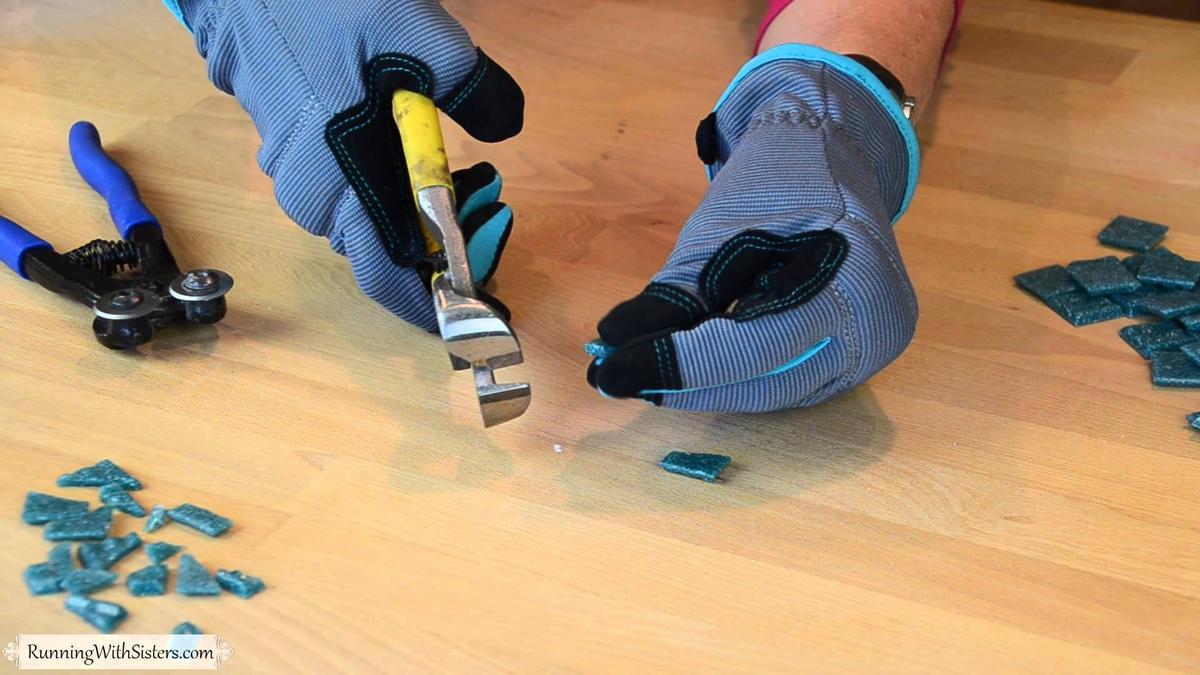
First, you need to get a hammer and the tesserae you decide to use. Give it a good bash until the pieces of the material are the size you are happy with. If you would like to use a more subtle method, you can also purchase a tile cutter to cut the tesserae. Now place the mosaic pieces onto the template you created earlier and take your time to decide on the pattern you want to create.
Step 4: Stick your mosaic pieces with adhesive
Once your mosaic pieces are in place and you are happy with the pattern you created, use an adhesive to stick the pieces down onto the foundation. When purchasing an adhesive, consider a few factors to help you determine which adhesive to buy. First consider whether your mosaic art piece will be placed indoors or outdoors, then look at the tiles or tesserae you are using as well as the foundation or surface you chose for your mosaic pieces. These three factors will determine the type of adhesive you should use. Let the adhesive dry for about 24 hours if you placing it indoors and up to 72 hours if you decide to feature your mosaic art outdoors.
Step 5: Apply the grout
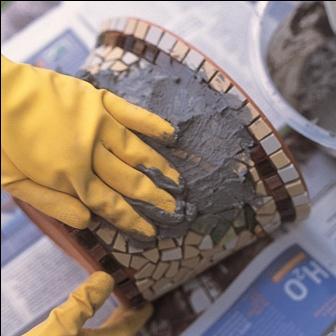
Once the adhesive has dried, you can start mixing the grout. Grout comes in different colours so you have the option to choose one that matches the colours of your mosaic pieces. Once you have mixed the grout with water to the correct consistency, spread the grout over the mosaic like you would spread butter on toast. Don’t forget to grout the sides as well.
Tip! Do small sections at a time so that the grout does not dry up.
Once you have placed a generous amount of grouting, let it rest for about 25-30 minutes. Now get a damp cloth or sponge and remove any excess grouting.
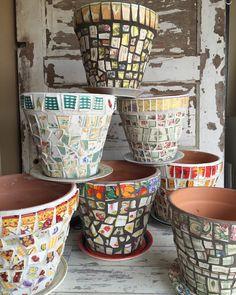
Daaddaaaa!!! Your first piece of mosaic art is complete! You should give yourself a pat on the back.