
There are few things I find more annoying than a sticky keyboard. One wants to write a simple word such as his, and instead one gets hissssss… And knowing that it was my own fault in the first place does nothing to reduce the frustration!
If, like me, you like to snack over your keyboard (in order to increase your productivity, of course!), this step-by-step guide on how to deal with sticking keys will come in useful.

You will need rubbing alcohol, lots of ear buds and / or a brush, some toothpicks, paper towels and a cloth. A can of compressed air is optional. You can also prepare a flat tool and a dish with warm soapy water in case you need to remove the keys, but let’s hope you will not have to go to such extremes. In any case, arm yourself with lots of patience!
Steps for cleaning the keyboard without removing the keys
- Shut down your computer and unplug a wired keyboard. If you are using a laptop, take out the battery.
- Turn the keyboard upside down and gently pat it on the back. Position the laptop in an inverted letter V shape for the patting procedure.
- Place the keyboard / laptop the right way up and spray some compressed air between the keys (optional).
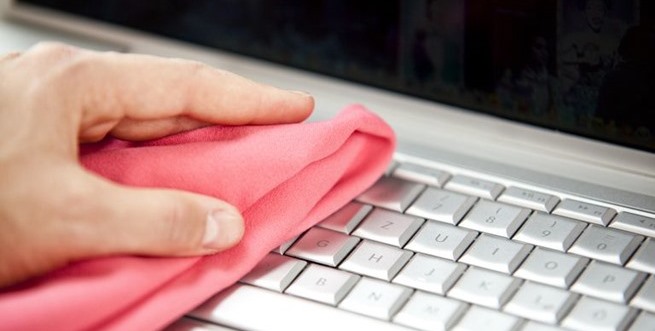
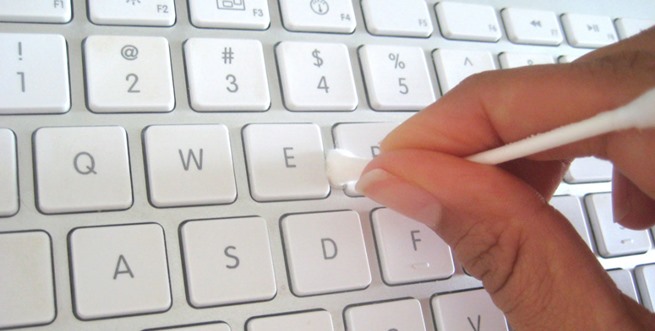
- Dip the tip of an ear bud into rubbing alcohol and clean around each key. You will probably need several ear buds.
- Alternatively, use a brush dipped into alcohol, cleaning it often on a paper towel or a cloth. The ear bur (or brush) should be just damp, not dripping with alcohol! You may need to use a toothpick to remove crumbs or debris from under the sticky keys.
- Test the key to make sure it is not sticking. Then move on to the next one. Continue until all your keys are working correctly.
If the keys are still sticky, it is time to resort to extreme measures! Disclaimer: Removing the keys from a keyboard can be tricky, so proceed at own risk. It may make more sense to buy a new desktop keyboard, or to take your laptop to a specialist for thorough cleaning.
However, if you are sill game, let’s get down to:
Steps for cleaning the keyboard while removing the keys
- Make sure that everything is still disconnected from the power source.
- Take a good photograph of your keyboard. All keys must be clearly visible.
- Remove keys with a blunt flat tool such as a plastic knife or a guitar pick. Alternatively, invest in a key puller tool. Note that some of the larger keys may have metal guides and slots; be sure not to bend them.
- Put the keys you removed into a dish filled with warm water and a mild detergent and let them soak for about half an hour.
- While the keys are soaking, clean their trenches with an ear bud or a brush dipped into alcohol, taking care not to leave any cotton strands if using ear buds. You may need to remove the plastic carriers that reside under the keys and clean them too.
- Take the keys out of the soapy water, rub them, rinse and leave to dry. If there is any dirt left, remove it with alcohol.
- When everything is squeaky clean and dry, put the carriers back into place, and then the keys, all the while consulting the photograph you took in step 1 of this section. Test each key after you attach it. If a key still appears to stick a little, clean it again!
- Power up your computer and open a word processor to make sure that the letter you press on your keyboard is what appears on your screen.
After all that trouble… no more snacking over the keyboard for me! At least not before the memory fades.