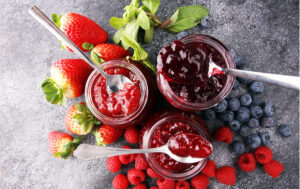
When you need that something tasty just to make your day a little better, you can turn to chocolates, sweets, and delicious baked goods, but what about some homemade jam? Not only is it rewarding to make your own, it will be yummy too. And you don’t have to do it alone. Set a day aside to make jam with family, friends or even your kids. Best of all, the flavour is up to you; choose your favourite fruit and go with it.
Fruit, fruit and more fruit
The first step to making jam is selecting your fruit of choice. Here is a list of the most popular and the best jam making fruits: strawberries, blueberries, cherries, raspberries, apricots, gooseberries, plums, rhubarb and kumquats. You will need to take into account the seasonality of each fruit when making your jam. The fruit mentioned above are just recommendations; feel free to choose your favourite.
Sterilise your jars
Before we start making the jam, we need to get all the chores out of the way. This includes sterilising the jam jars. If you are wondering why this is at all important – well, the reason for doing this is to ensure that there is no bacteria in the jars which could cause your jam to go mouldy. There are two ways to do this. If you have a dishwasher, you can use it to sterilise your jars. If you don’t have a dishwasher, wash the jars and lids, place them on a baking tray and leave them in the oven for 30 minutes at 100 degrees celsius. Tip! Make sure you fill your jars while they are still hot out of the oven.
Start your jam session
- You need to find the widest pot or saucepan possible. The large surface area is needed for fast water evaporation, giving your jam a more powerful flavour.
- Depending on how much jam you want to make, you can alter your quantities. However, stick to the rule of equal parts fruit (of your choice) and sugar. Make sure you thoroughly wash your fruit before adding the ingredients to your pot. Tip! Fruit like strawberries, blueberries and blackberries are low in natural pectin, so use pectin sugar rather than normal sugar.
- Now the fun begins. Certain flavours will add some depth to your jam. Feel free to experiment and try different combinations. As a guideline, here are some tried and tested flavour combinations. Vanilla pods go well with strawberries and raspberries. A splash of lemon juice compliments blueberries and cherries. Apricots go well with vanilla pods or lemon juice. Cinnamon and star anise go well with plums. Some alcohol like a sherry can also go well with a number of fruit.
- Now that you have all your ingredients in the pot, take a masher and combine the sugar, fruit and extra flavour into a mush. For a chunkier jam, don’t mash too much; if you prefer a smooth jam, take a bit more time with the masher.
- Place your pot on a medium heat and leave it to simmer, don’t be tempted to stir.
- Once the jam reaches a temperature of 103 to 105 degrees Celsius, it is ready. Tip! If you don’t own a thermometer, use the wrinkle method to test if your jam is ready. Place a plate in the fridge until cold. When you think your jam is ready, remove the pot from the heat and scoop a spoon of jam onto the cold plate. Then just push it slightly with your finger. If it wrinkles, it’s ready to be scooped into jars!
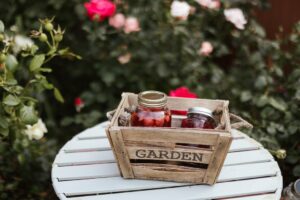
- After pouring your homemade jam into your warm jars, seal with the lid and leave it to cool. You can add pretty labels if you wish or use a black marker to label your jam.
Now you are equipped to make your own jam. Remember to have fun while doing it!


